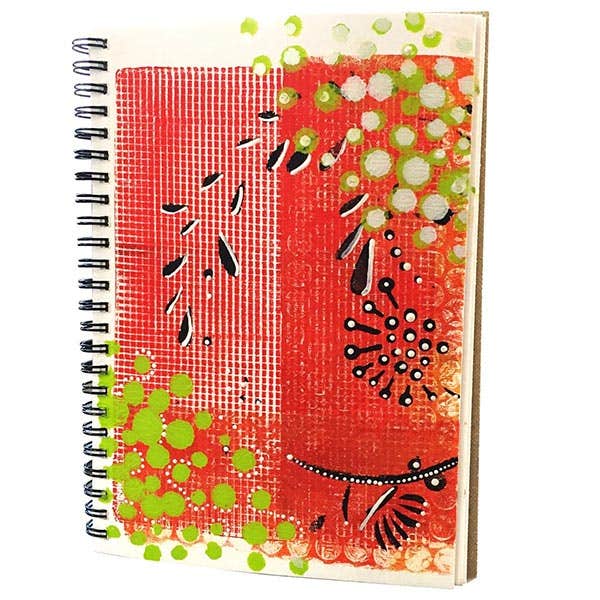
Create a fun journal page building up layers of patterns and colours. The possibilities are endless and no two projects are ever the same!
To download a PDF version of this project, click here.
How to do it
- Apply a small amount of paint to your gel press, using the lino roller or brayer, spread it to a thin even layer. Lay a piece of corrugated card, face down on the plate and gently press. To create a cross hatch, reposition the card in the opposite direction. Press your journal page face down onto your gel press. Gently rub the back of your page then peel it off to reveal your pattern. Allow the page to dry before applying the next layer.
- Spread a contrasting paint colour onto gel press with your brayer. Lay a piece of bubble wrap face down and gently press onto your journal page. Use scrap paper to remove excess from the gel press.
- Apply another contrasting colour of paint to your gel press and spread with your brayer. Position your stencil on top of the gel press and then layer journal page down and press firmly. Peel the page off to reveal.
- Using the end of a paint brush, add small dots of paint to your gel press, lightly press the journal page onto the gel press. Reposition the opposite corner of your page to repeat the same pattern. The second corner may be lighter but gives a great effect. Set aside to dry and then experiment by trying a different combination of layers and colours on another page of your journal.
Clean up: Baby wipes are a quick and effective way to clean the gel plates – just wipe clean and then pat dry with a clean paper towel. Alternatively wash the plate with mild soapy water and then pat dry with a clean paper towel.
Tips: Acrylic based paint is recommended as other paints and inks can stain the surface. Avoid tools with sharp edges or pointy tips to prevent damaging the surface. Experiment using different materials to create textures - foam stamps, stencils, plastic, fabric, leaves, feathers, twine etc.

