Level: Easy
Duration: 30 mins
Brighten up your fridge with these eye catching STAEDTLER FIMO Neon Magnets.
Click here for a PDF version of this project.
What you will need
- A variety of STAEDTLER FIMO Neon Modelling Clay
- STAEDTLER Silicon Push Moulds (Gems)
- Blade
- Scissors
- FIMO Gloss Varnish
- Oven
How to do it
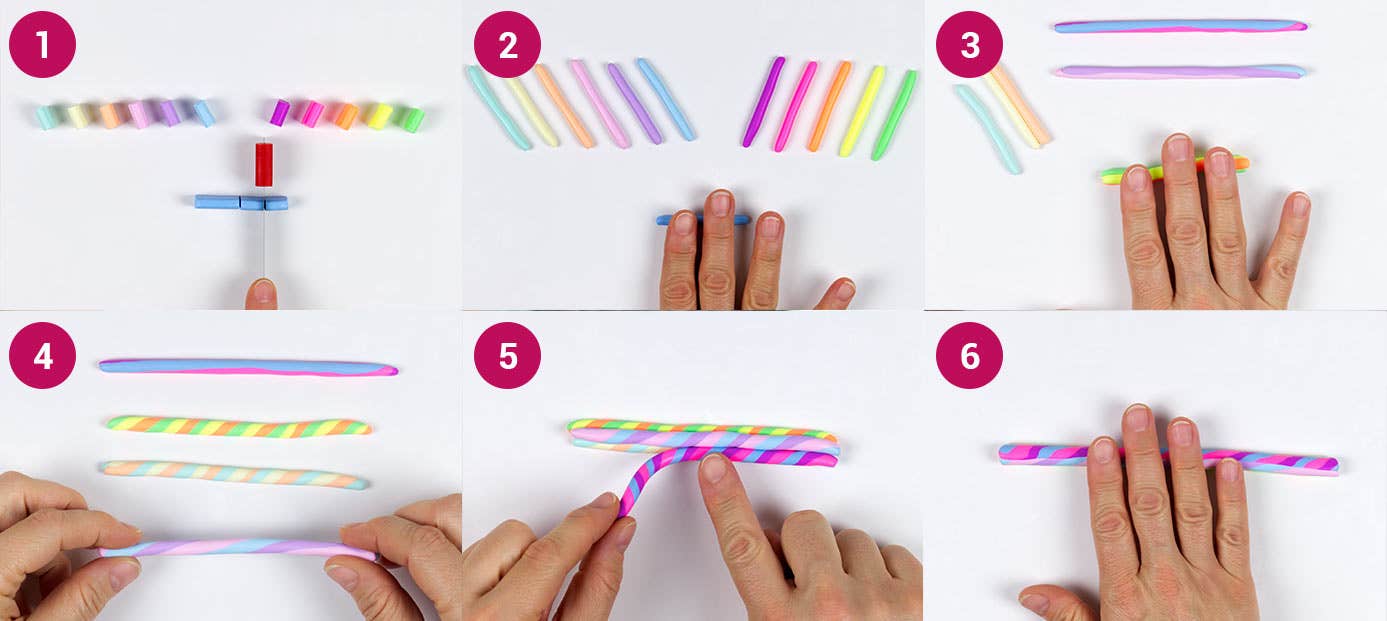
- Cut a quarter portion of each of your desired FIMO colours.
- Roll each piece into a cord roughly 4cm long.
- Combine three different coloured cords together.
- Twist all the cords together.
- Combine all cords into one thick call.
- Roll them together.
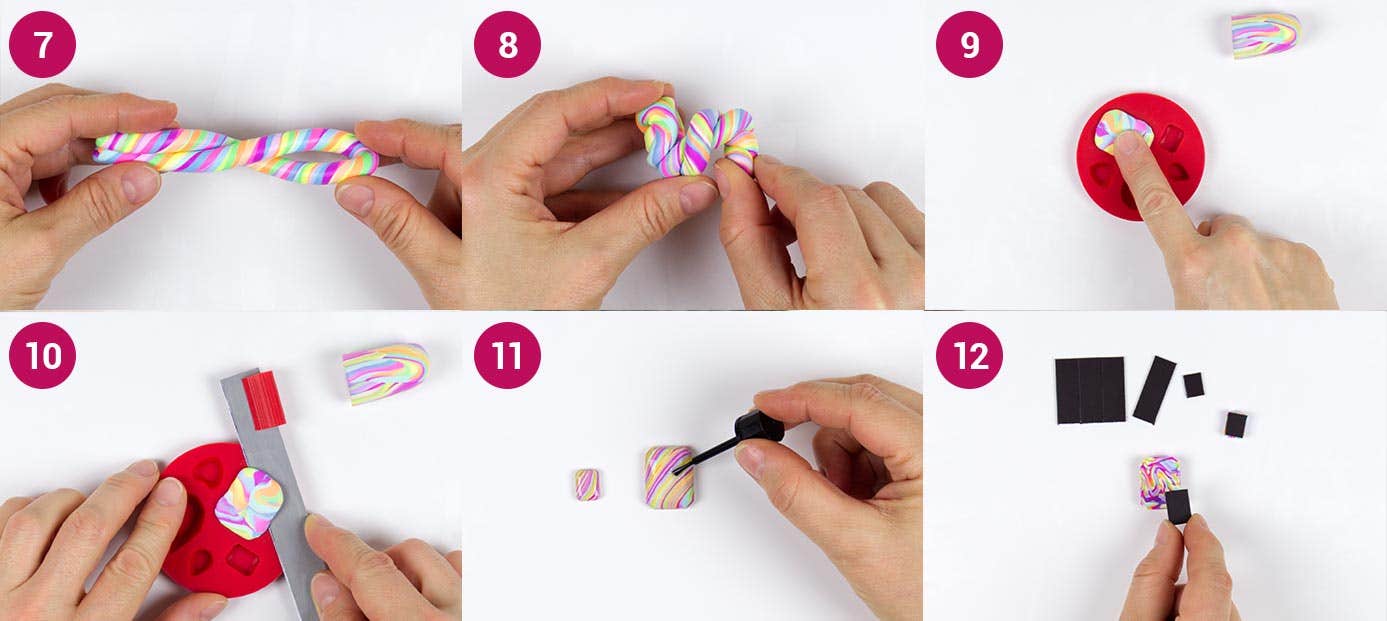
- Twist the thick cord on itself again and roll it together.
- Fold the cord one more time, twist it and shape into a ball.
- Now cut a piece off the ball and press it into the silicon mould, ensure to fill up all the corners.
- Cut the excess FIMO away using the FIMO blade or knife. Harden the silicon mould and the FIMO in the oven for 30 minutes at 110° C / 230° F and leave to cool completely.
- Remove the clay from the mould and allow to cool a little longer.
- Finally, coat your set clay with FIMO Gloss Varnish.
