Time needed: 10 minutes
What you will need
- Scissors
- Scrapbooking paper
- Brads
- Paper flowers
How to do it
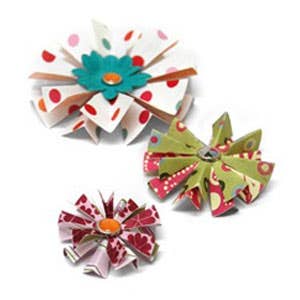
- Cut circles out of the scrapbooking paper (two circles makes one daisy). Your circles can be any size you like, depending on how big you want your daisy to be.
- Once you've cut your circles, make 8 cuts as shown below. Do not cut all the way through the circle - you will need to leave a small circle area in the centre where you will place the brad.
- Repeat this step for each layer of the daisy.
- Fold the petals - each in half lengthways (as shown by the dotted lines).
- Make holes in the centre of the layers, making sure the hole isn't too big (use a craft knife!)
- Assemble the daisy by placing one layer on top of the other and securing them with a brad. Place a paper daisy underneath the brad for added effect!


