Level: Easy
Duration: 45 minutes
Christmas is a magical time of year! Especially when you get to unveil a little present from your very own homemade advent calendar. This Christmas forest is not just a cute advent calendar, it also makes a gorgeous display for your windowsill. The little trees can be decorated however you like. We’ve decorated ours with STAEDTLER Fineliner pens and metallic markers.
What you will need
- STAEDTLER Triplus Fineliner Pen Sets
- STAEDTLER Metallic Markers
- Coloured card
- Template
- Eraser
- 2B Pencil
- Clear ruler
- Scissors
- Glue Stick
How to do it
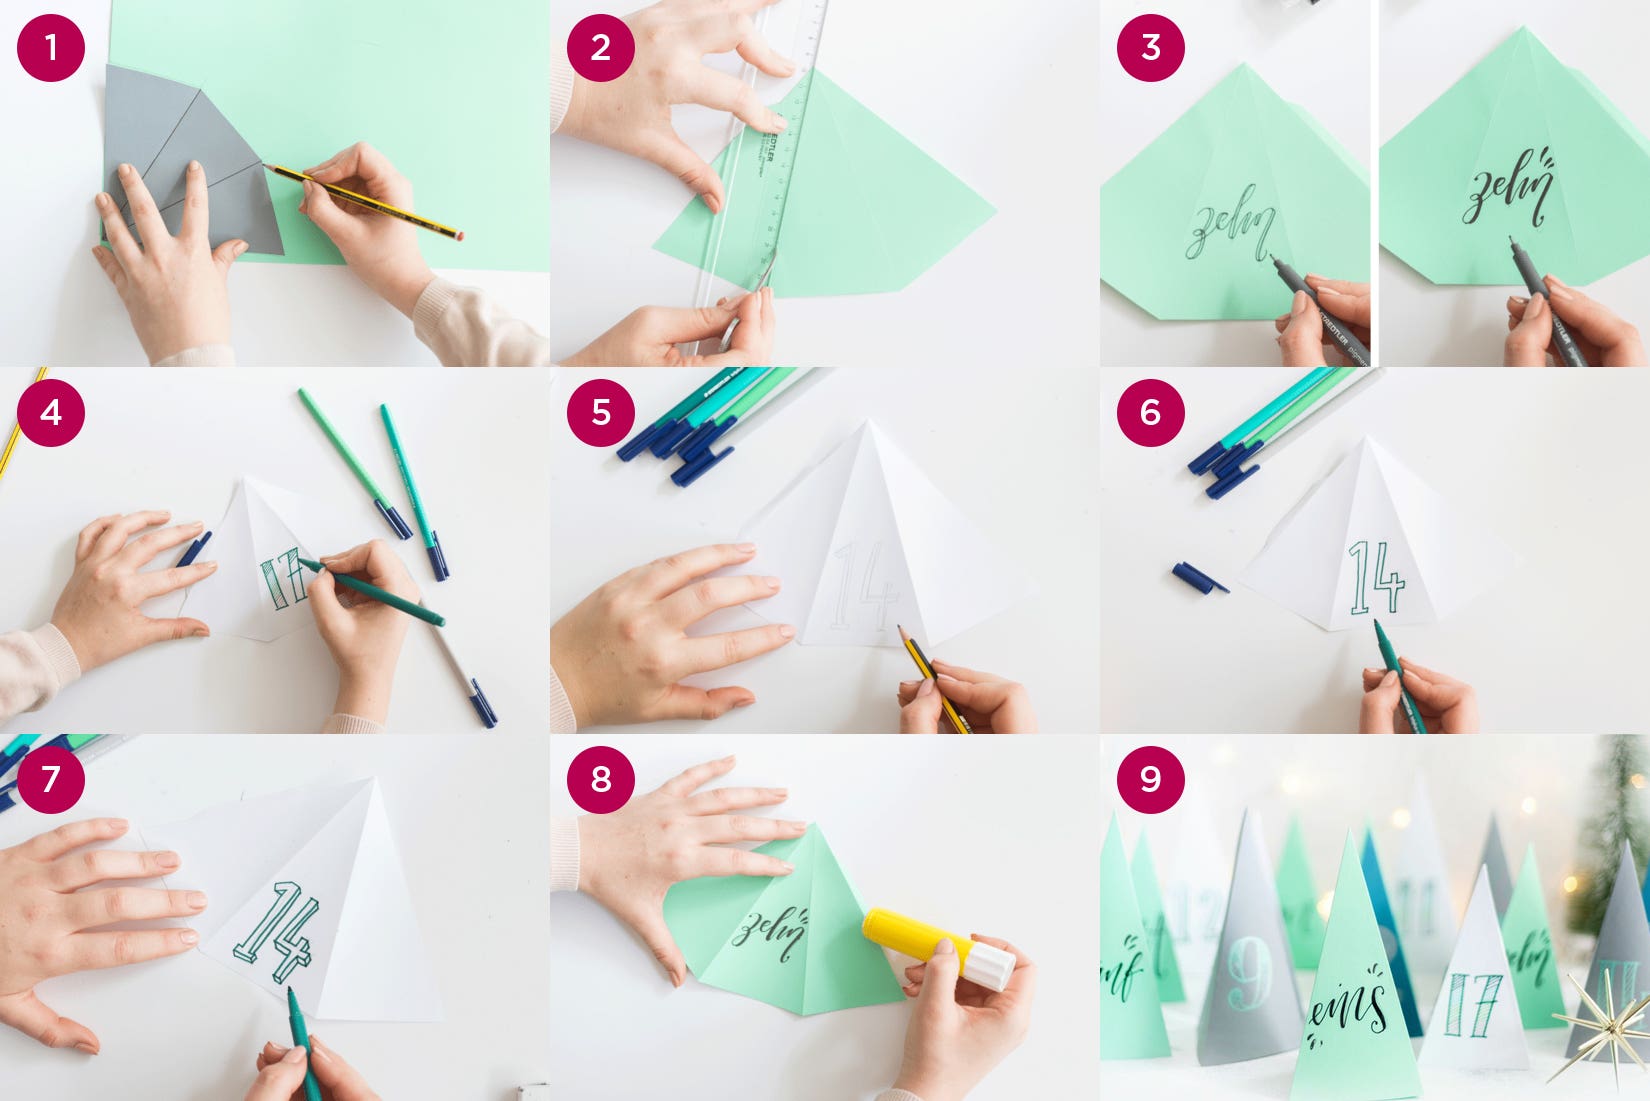
- Print out the template for the trees in a range of sizes, transfer to the card and cut the trees out.
- To make the folds straight, use a ruler as a guide and go over the fold lines on the template with the blunt side of your scissors.
- Use a pencil to write numbers on your tree. We’ve done ours in cursive handwriting and gone over it with a Fineliner pen.
- Try a shaded lettering effect on some of your trees by writing your numbers in thick lettering with a pencil. Use the Fineliner to define the outline of your text and fill the inside with stripes.
- For this design, light coloured paper works best. Draw the number with a pencil. Add an outline so that the text is thick.
- Trace over your pencil marks with a Triplus color fibre-tip pen.
- Add 3D lines to the right side of your number with a Triplus color fibre-tip pen. Now shade in the space between the 3D lines with a lighter colour.
- Glue the folding tab.
- Fold your trees and display them in your home. Don't forget to place a surprise under each one!

Check out the video below for more detailed instructions:


