Wiggle your tail and hop into the Easter celebrations this year!
What you will need
- Faber-Castell colour pencils
- Faber-Castell crayons
- Faber-Castell Connector Pens or other Faber-Castell markers
- UHU Glue Sticks
- Scissors
- Paperclips
- Additional creative materials (coloured paper, crepe paper, tissue paper, cotton wool or cellophane)
- Lightweight natural materials (dried autumn leaves, coloured feathers, etc.)
- Easter Bunny Hat Template, A4 cardstock
Video Tutorial & Instructions
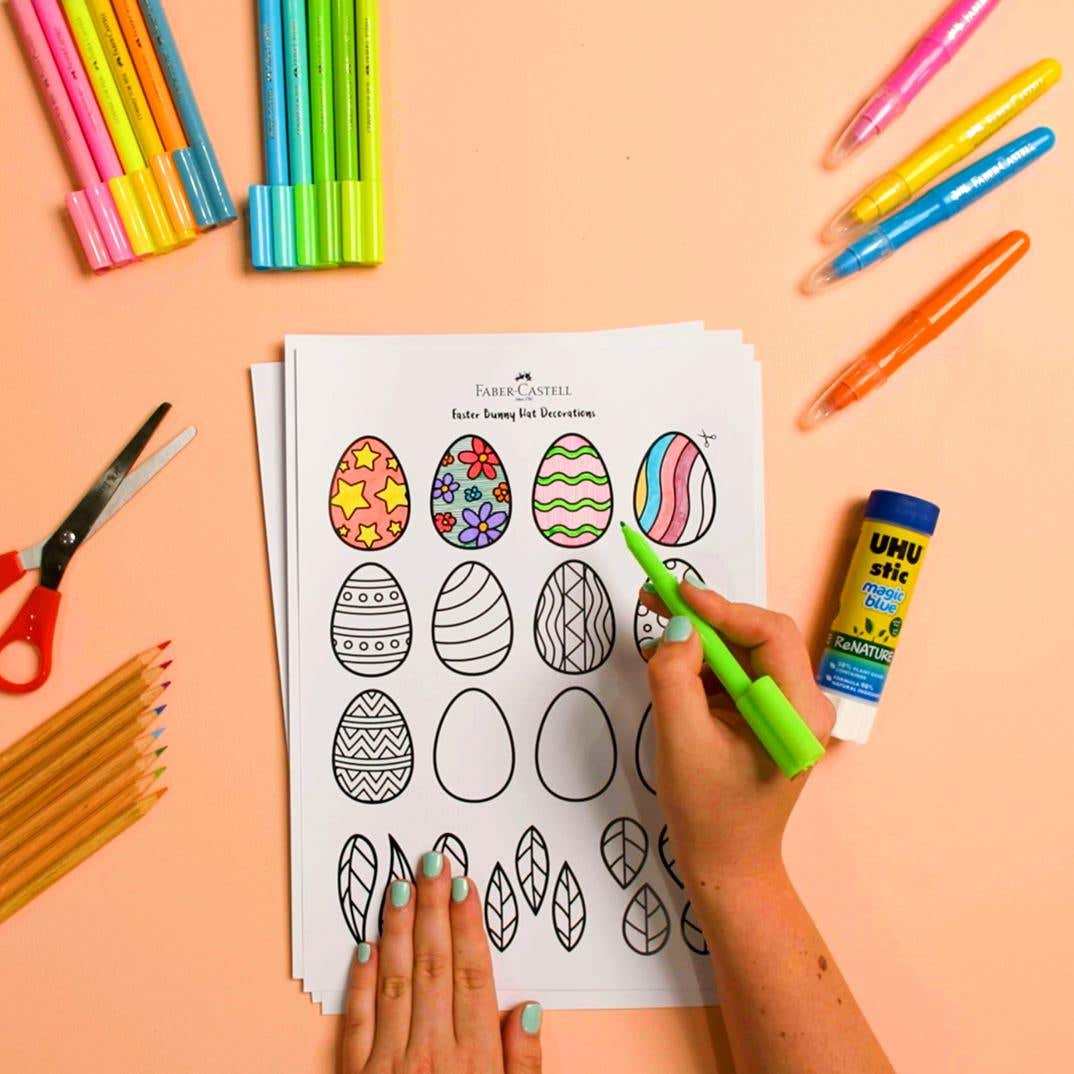
Step One:After printing out the Easter Bunny Hat template, use a variety of Faber-Castell colour pencils, crayons and Connector Pens to create interesting Easter-themed patterns and shapes as your colour. |
 |
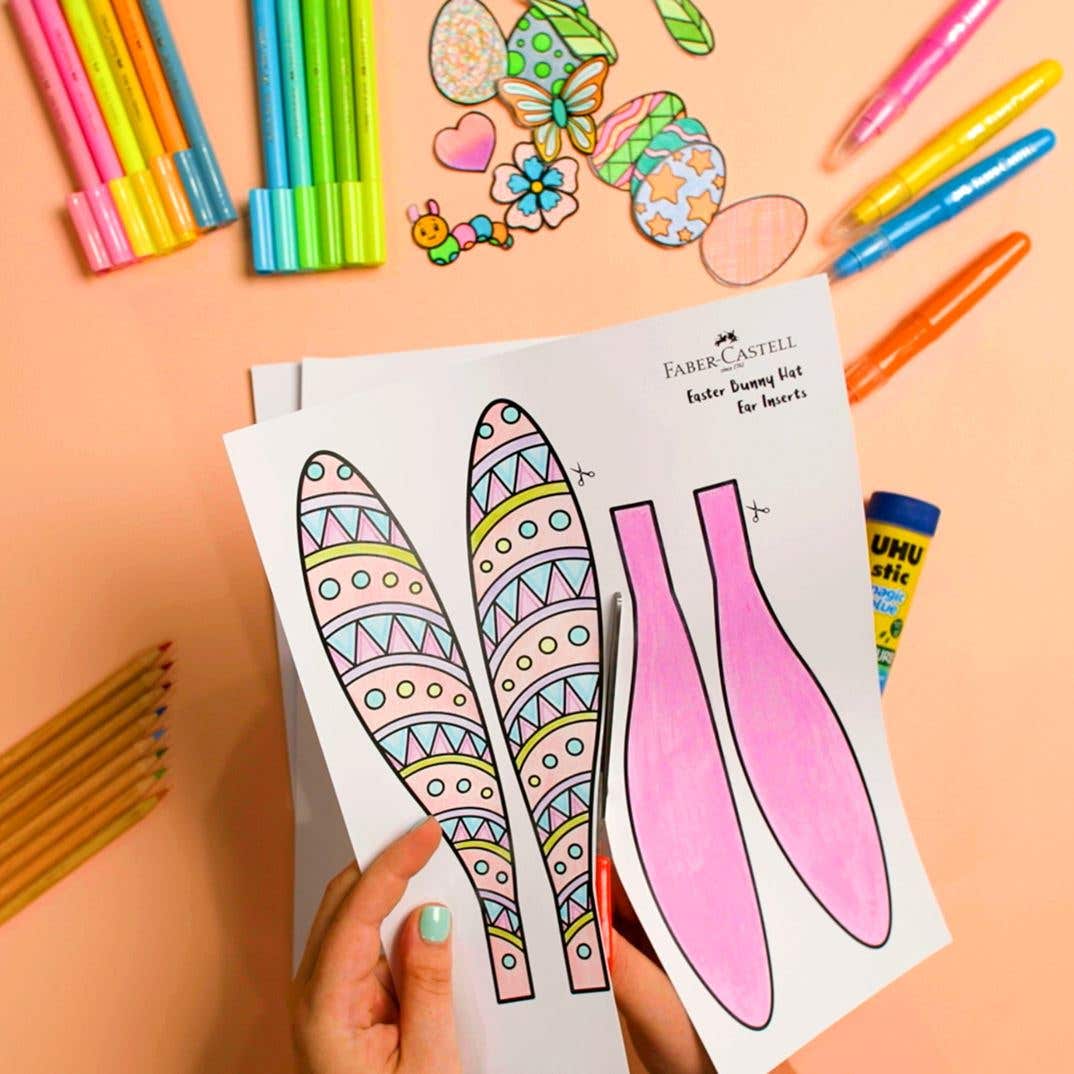
Step Two:Using scissors, cut around the outside of the bands, ears, ear inserts and decorations. |
 |
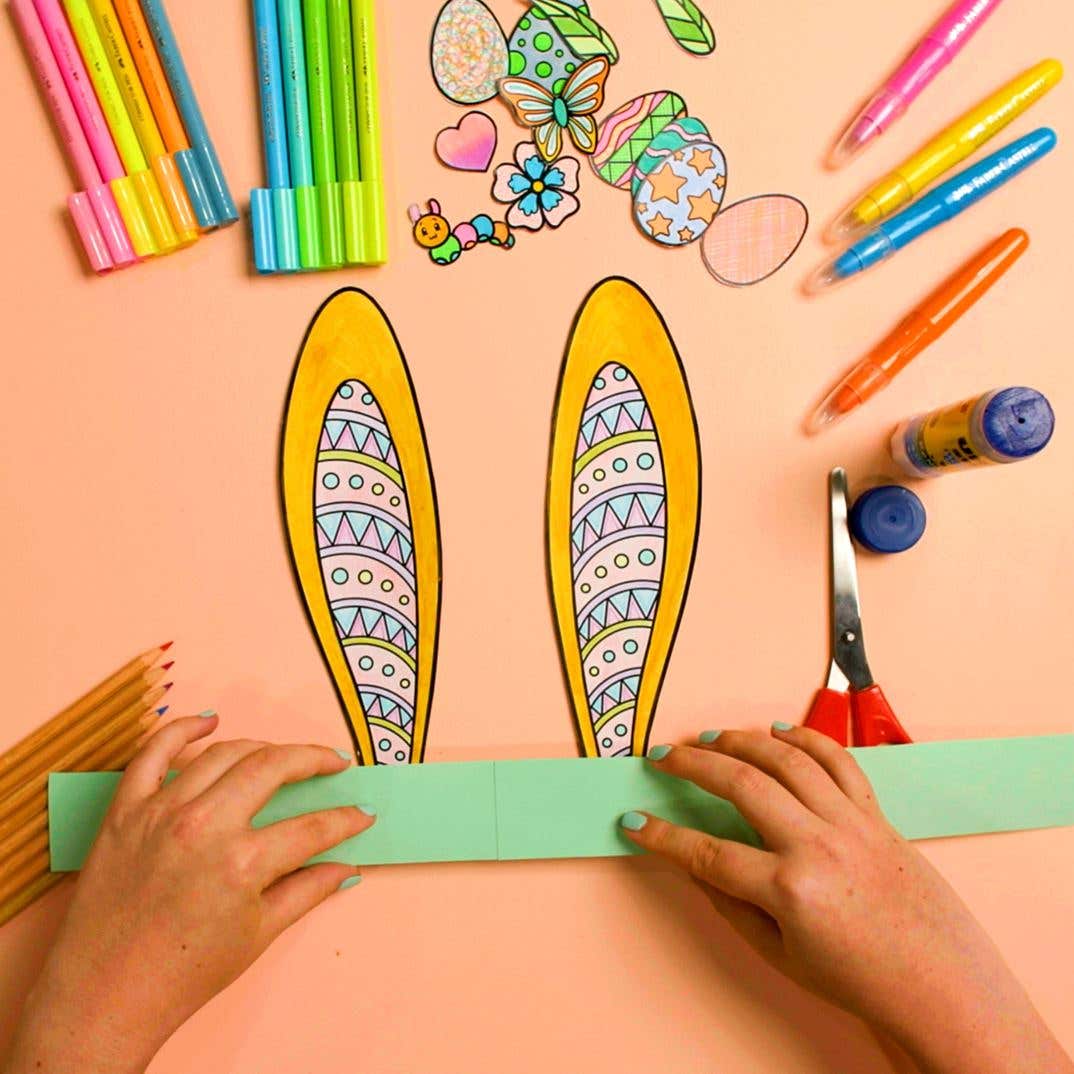
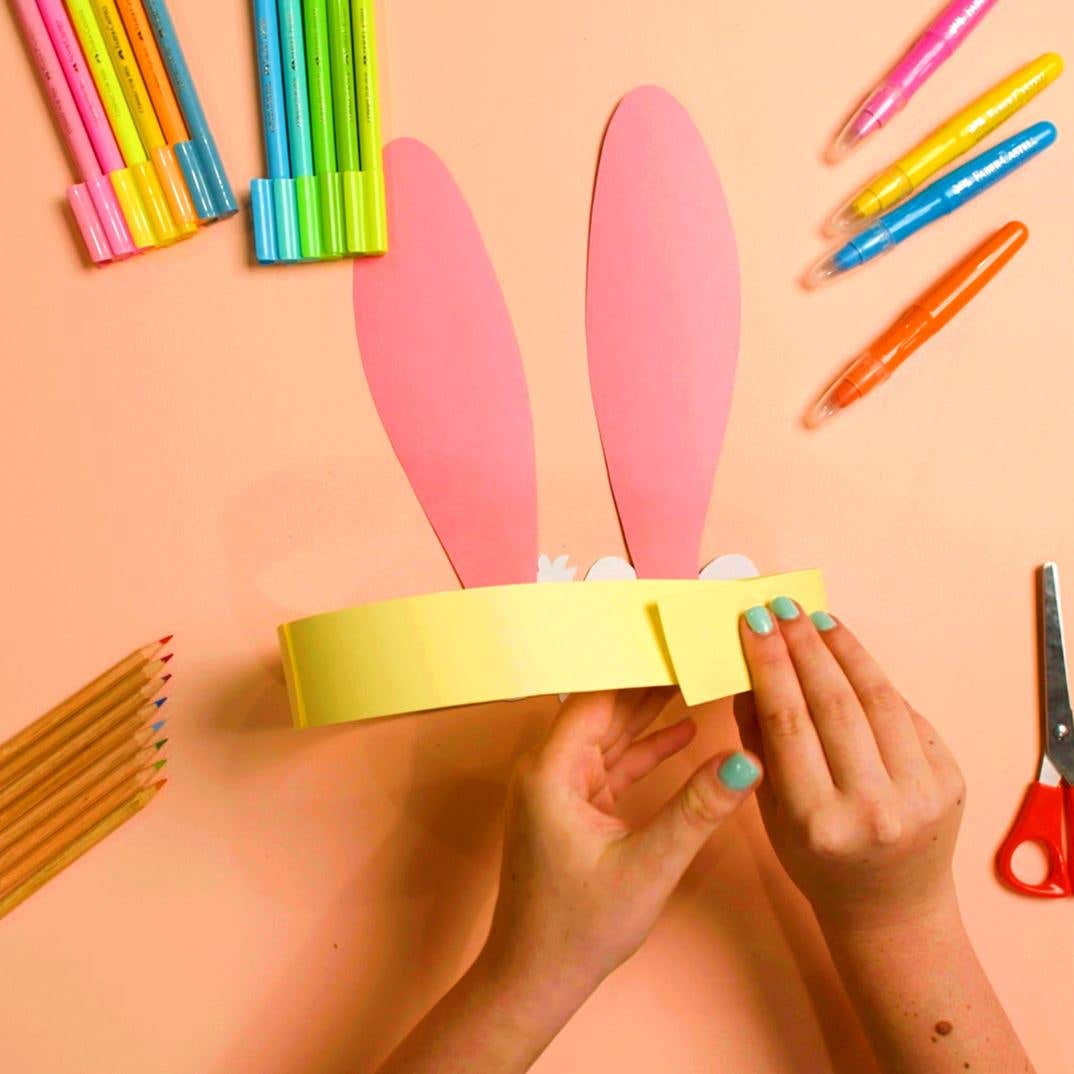
Step Three:Take three band strips, overlap each strip by roughly 3 centimetres and glue them together to create one long band. Then, glue the ear inserts to the ears. Once these are dry, attach the ears to the inside of the band, positioning them in the middle of the strip. Leave until completely dry. |
 |
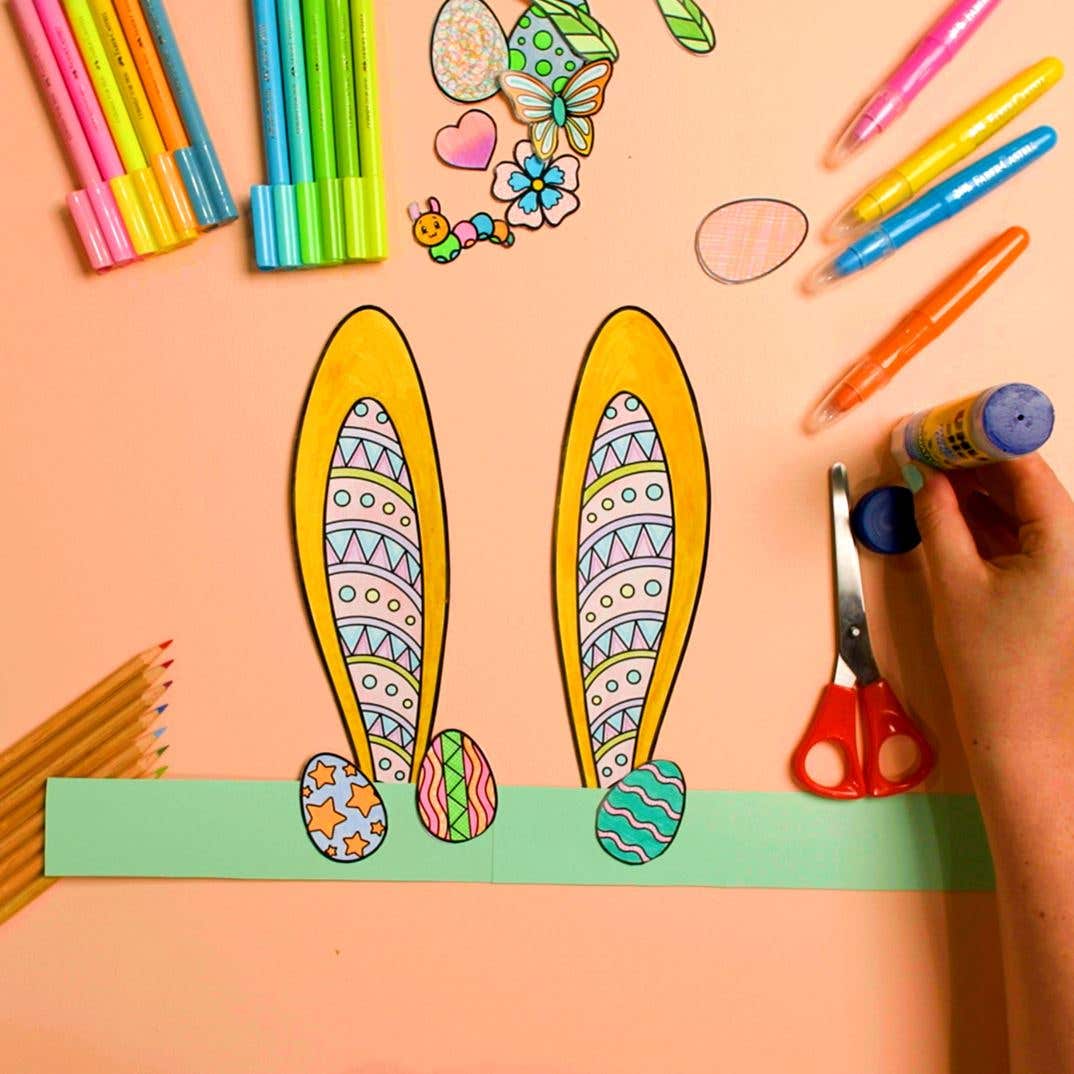
Step Four:It’s time to let your personality shine! Decorate your hat with decorations of your choice. Layer the decorations to create a beautiful Easter-themed collage. Leave until completely dry. |
 |
Step Five:Once the hats are dry, With the help of a friend, hold your partner's hat to your forehead, and have your friend bring the bands together at the back and secure them with a paperclip. Once it’s fitting comfortably, remove the hat and glue the overlapped sections together. Leave to dry, and once done, get ready for a splendid Easter hat parade! |
 |
Thanks to our friends at Faber-Castell for this project, originally published at: https://www.faber-castell.com.au/tutorials/easter-lesson-plan-bunny-hat
-
 Faber-Castell Connector Pen WalletsFrom $7.95
 -
 Faber-Castell Classic Colour Pencil SetsFrom $7.95
 -
 Gala Crepe PaperFrom $1.00 $3.15
 -
 UHU Glue SticksFrom $2.50
 -
 D&L Craftworkz Turkey FeathersFrom $2.30 $3.95
 -
 Jasart Byron Kids Construction Paper PadSpecial Price $8.15 Regular Price $11.25
 -
 Faber-Castell Little Creatives Playsafe ScissorsSpecial Price $1.75 Regular Price $3.50


