Haven’t we all picked up someone else’s glass at a party and wondered if it was ours? Maybe you took a sip before realising it was not your drink. With Covid and other nasties about, accidentally sharing glasses is best avoided. We have a creative and elegant solution to this common party faux pas. FIMO Glass tags! Simple to make, these glittery trinkets make identifying your glass easy, perfect for the party season ahead!
We have made our glass tags in black, but you can use any colour you like. We recommend making them in a range of colours so your guests can each use a unique design.
Level: Easy
Duration: 45 minutes

What you will need
- STAEDTLER FIMO Soft Modelling Clays
- STAEDTLER FIMO Metal Leaf Packs
- STAEDTLER FIMO Cutter Blades
- STAEDTLER FIMO Shaped Cutters
- STAEDTLER FIMO Acrylic Roller
- Small round cookie cutter
- Ribbon or string
- Baking Paper
- Oven
How to do it
Use your fingers to knead half a block of black FIMO soft until the FIMO is warm and malleable.
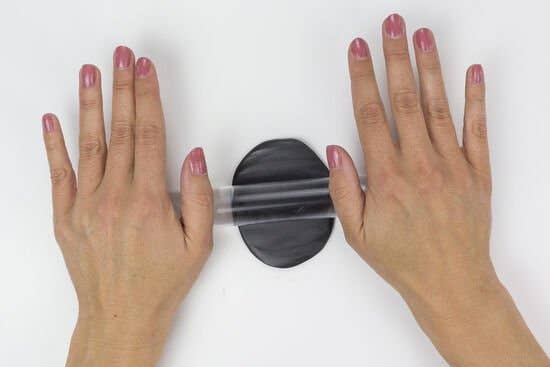
Once it is soft enough, roll the FIMO in your palms to form a ball.
Place the ball onto baking paper and use your acrylic roller to flatten your FIMO into a sheet of approximately 3 mm thick.
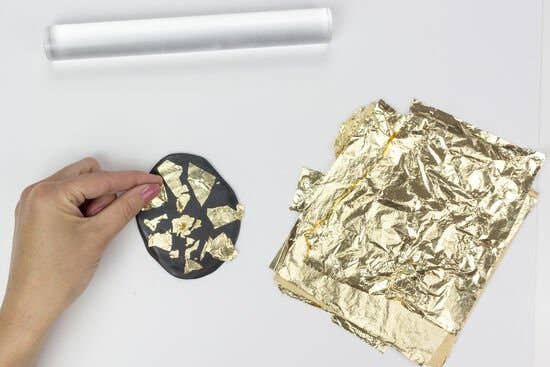
Tear off small pieces of your FIMO Metal Leaf and apply them to your FIMO. Ensure they are stuck to the FIMO by gently rolling the acrylic roller over the top.
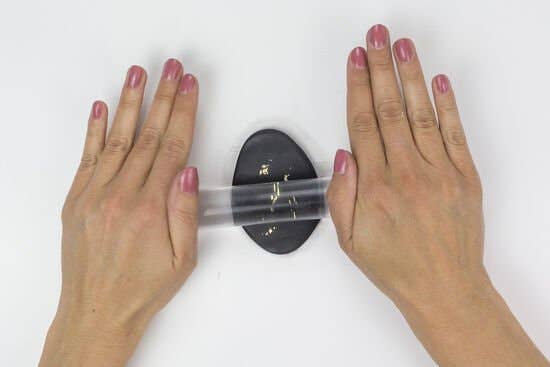
Knead the metal leaf covered FIMO into a ball with your fingers and palms. Then use the acrylic roller to flatten the FIMO into a 3 mm thick sheet.
This process will break up the metal leaf and create a shimmering glitter effect in your FIMO.
It is best to work on baking paper for the remaining steps. By working on baking paper, you avoid double handling and you will get a better result.
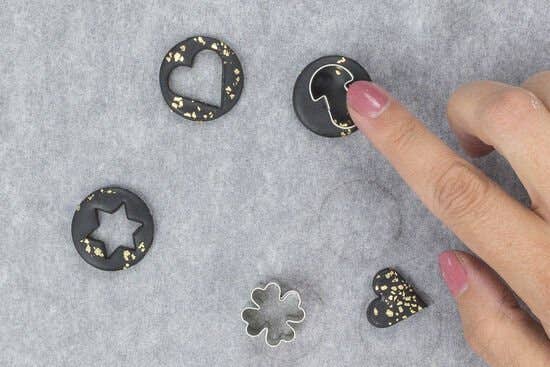
Use a round cookie cutter to cut small disk-shaped pieces. You might need to re-work your FIMO, rolling and flattening it down again to get enough disks cut.
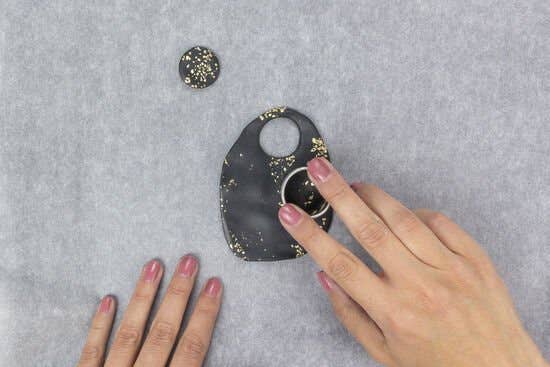
Use the small cookie cutters to cut the middle motifs out of the FIMO. Remember to only use each cookie cutter once as your glass tags should be unique.
Put your glass tags into the oven to bake at 10° C / 230° F for 30 minutes.
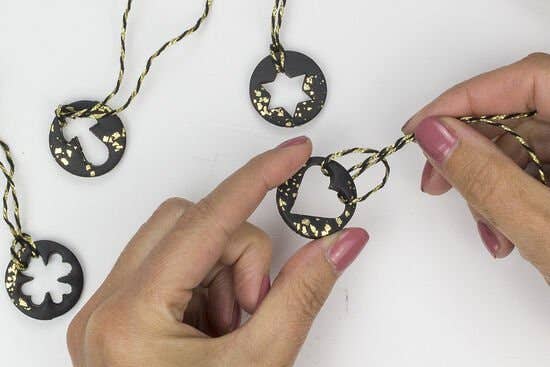
Once your tags have cooled, attach a string or ribbon to each tag. Now the tags can be tied to your guests’ glasses and the party can begin!
Video Tutorial


