Level: Medium
Duration: 35 mins
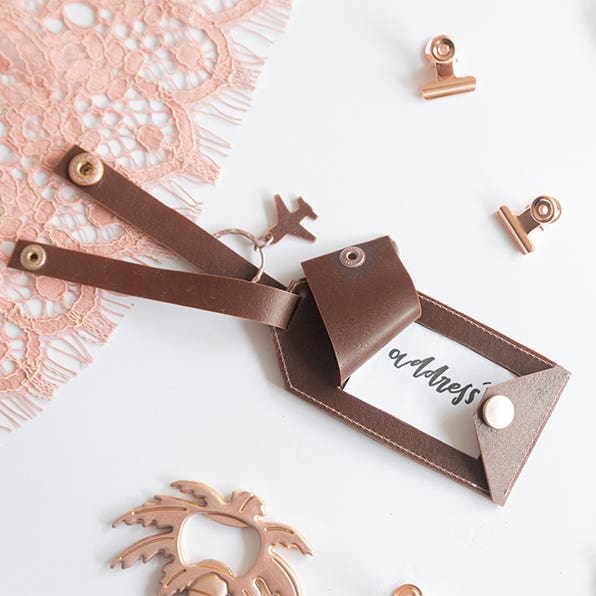
Create a personalised luggage tag with STAEDTLER FIMO Leather-Effect Modelling Clay to take on your next holiday.
Click here for a PDF version of this project and template.
What you will need
- STAEDTLER FIMO Leather-Effect Modelling Clay
- STAEDTLER FIMO Acrylic Roller or STAEDTLER FIMO Clay Machine
- Scissors
- Oven
- Cutter Blade
- Hammer
- 2 x Metal Stud Fasteners
- Letter Stamps (Optional)
- Needle & thread or sewing machine
How to do it
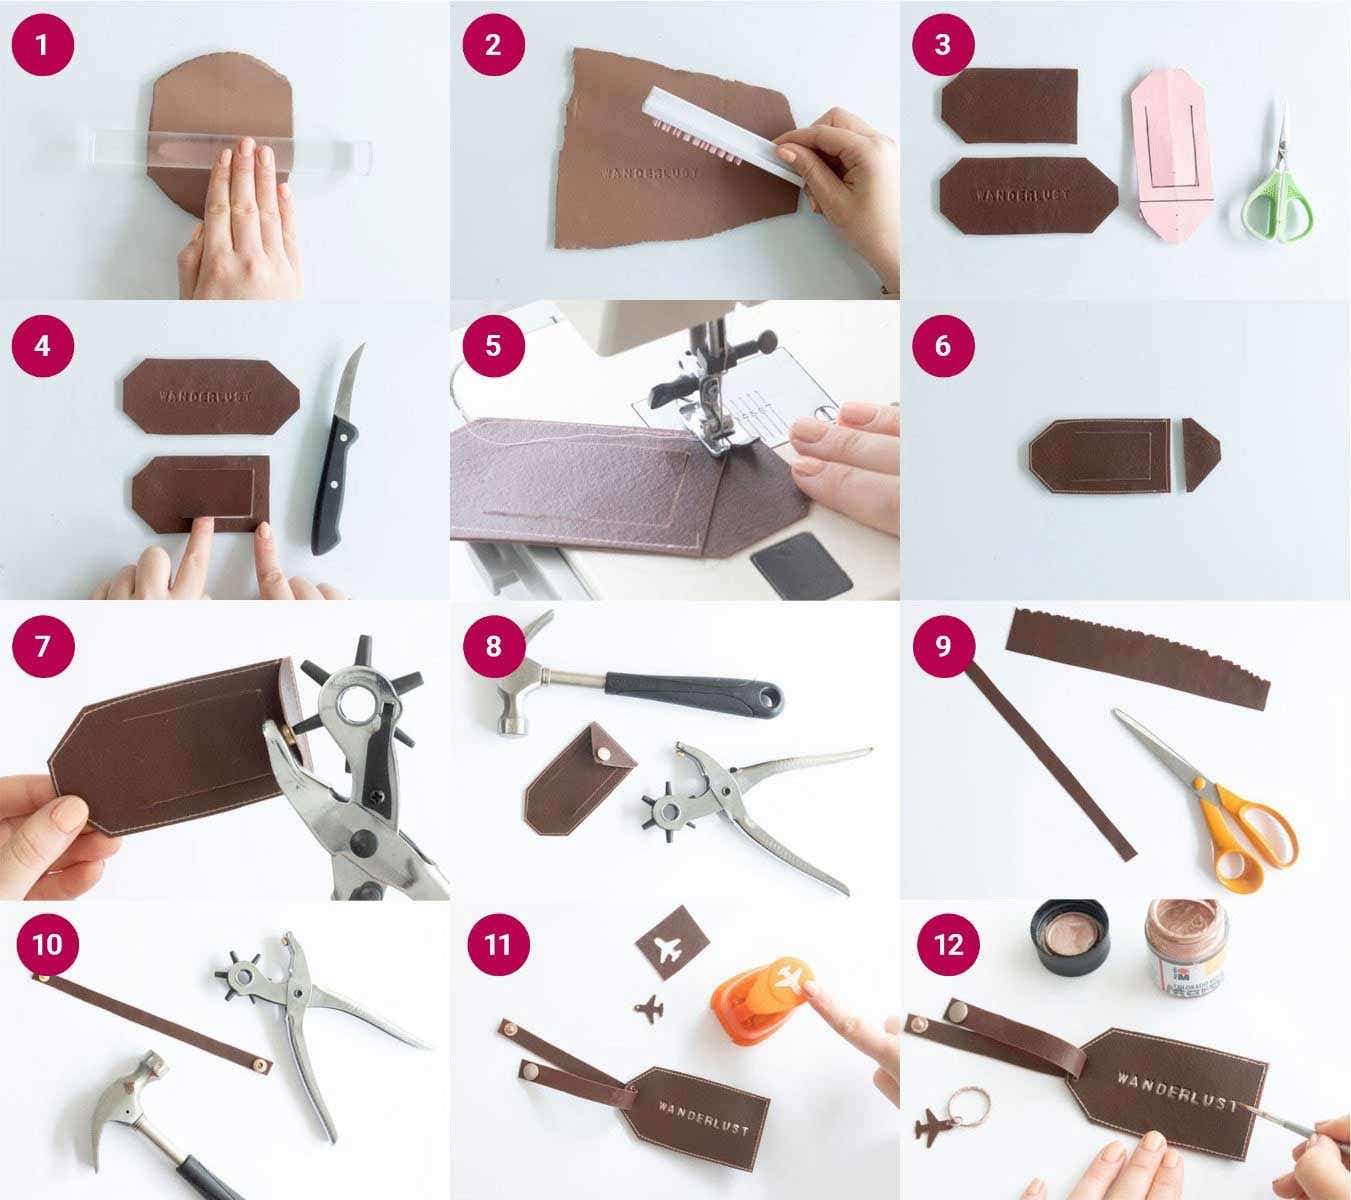
- Choose your colour of FIMO Leather Effect Modelling Clay and roll out the block into a thin sheet approx 1 mm thick (Setting 8 if you are using the FIMO Clay Machine).
- Use your letter stamp to imprint your word of choice onto the sheet.
Lay the FIMO Leather Effect sheet on baking paper and harden in the oven for 30 minutes at 130°C. Leave to cool. - Cut the template out of paper (choose 1 of the 2 size options) and lay it onto the FIMO Leather Effect sheet (ensure your lettering is in the centre. Use a pencil to trace around the edges. Fold over the tab on the template and trace this out on the sheet. Cut out the outline with scissors.
- Cut the "U" shape into the smaller section of the FIMO creating a window.
- Place the 2 pieces of FIMO together and sew around the edges leaving the part where the tab sticks out. This will be where you insert the label.
- Cut off the protruding tab leaving a 1mm space for sewing. Place the tab back on and sew along the edge.
- Punch holes in the required places for the stud fasteners.
- Attach the stud fastener to the tab (you may need a hammer to secure it).
- Cut out a 1 cm x 20 cm strip from the remaining FIMO sheet
- Attached the stud fasteners to the strip.
- Cut a slot in the top of the tag using a knife or blade and feed the strip through.
- Add the finishing touch by painting in the lettering with a metallic acrylic paint and leave to dry.
Happy Travels!
Watch the Video
Featured Products


