Introduction to Oil Pastels
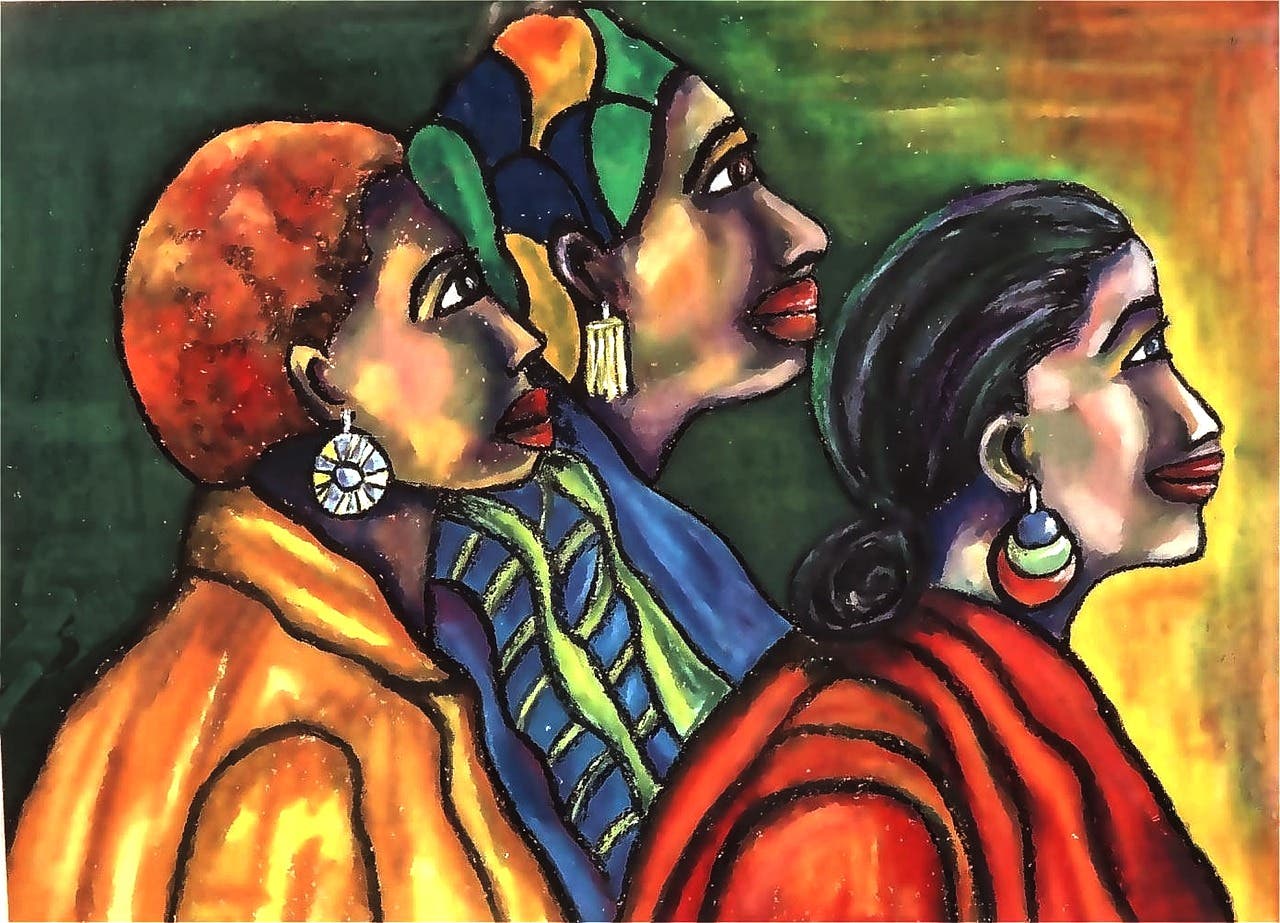
Oil pastels are a type of art medium that consists of pigment, a binder, and a wax base. They are similar to traditional soft pastels but have a higher concentration of pigment and a different binder, which gives them a unique set of characteristics. Oil pastels are known for their vibrant colours, blendability, and versatility.
What are oil pastels?
Oil pastels are a versatile and vibrant medium for artists, offering a unique combination of rich colours, smooth blending, and ease of use. They are made from a mixture of pigments, oil, and wax, which gives them their characteristic creamy texture. Unlike traditional soft pastels, oil pastels do not crumble or produce dust, making them an attractive choice for artists of all ages and skill levels.
Benefits of using oil pastels
Oil pastels are a versatile and vibrant medium that offers several benefits for artists of all skill levels. Here are some of the advantages of using oil pastels:
Rich, vibrant colours: Oil pastels come in a wide range of colours, allowing artists to create stunning, dynamic works of art.
Ease of use: The creamy consistency of oil pastels makes them easy to apply and blend, even for beginners.
Versatility: Oil pastels can be used on various surfaces, including paper, canvas, wood, and more, making them suitable for a wide range of artistic projects.
Blendability: Oil pastels can be easily blended together to create smooth transitions and new colours, giving artists more creative freedom.
Low maintenance: Unlike other mediums like oil paints, oil pastels do not require solvents or special brushes, making them easy to clean up and maintain.
Oil pastels are an exciting and versatile medium that can be enjoyed by artists of all skill levels. With their rich colours, ease of use, and compatibility with various surfaces, oil pastels have become a popular choice for many artists worldwide.
Getting Started with Oil Pastels
Embarking on your journey with oil pastels requires some preparation and the right tools. In this section, we will discuss the essential tools and materials, how to prepare your workspace, and choosing the appropriate paper or surface for your artwork.
Essential tools and materials
Oil pastels :Select a set of oil pastels based on your skill level and budget. Popular brands include PanPastel, Holbein, Micador, Sakura, and Van Gogh.
Paper or surface: Oil pastels can be used on various surfaces such as paper, canvas, wood, and metal. Heavyweight, textured papers like watercolour paper or pastel paper are often recommended for beginners.
Blending tools: Fingers, paper stumps (tortillons), or colour shapers can be used to blend and smudge colours, creating smooth transitions and effects.
Fixative spray: A fixative spray helps protect your finished artwork from smudging and fading.
Pencil and eraser: For sketching your composition before applying oil pastels.
Additional tools (optional): Palette knives, brushes, or other mark-making tools can be used to experiment with different techniques and textures.
Preparing the workspace
Choose a well-lit area with good ventilation to ensure optimal working conditions.
Protect your work surface with a drop cloth, newspaper, or wax paper to catch any stray pastel dust or pigment.
Organise your materials within easy reach, including a clean cloth or paper towel for wiping your hands and tools.
If desired, use an easel or drawing board to hold your paper or surface at a comfortable angle.
Choosing the right paper or surface
Experiment with different types of paper to find the one that best suits your style and technique. Heavyweight papers with a textured surface, like watercolour or pastel paper, are ideal for oil pastels as they provide good grip and can withstand multiple layers.
Canvases, wood panels, or metal sheets can also be used for oil pastel artwork. Priming the surface with gesso or an oil pastel ground can enhance the adhesion of the pastels and create a more stable foundation.
If you're unsure which surface to use, start with a less expensive paper option and gradually explore other materials as you become more comfortable with the medium.
By gathering the essential tools and materials, setting up a comfortable workspace, and selecting the right surface for your art, you'll be well-prepared to dive into the world of oil pastels and create stunning, expressive pieces.
Basic Techniques for Using Oil Pastels
Mastering various techniques is essential to fully harnessing the potential of oil pastels. In this section, we will cover some basic techniques that can help you create diverse and dynamic artwork using oil pastels.
https://cdn.pixabay.com/photo/2021/07/20/06/29/oil-pastel-6479870_1280.jpg
Stippling and pointillism
Stippling involves creating a pattern or texture by applying small dots of colour onto the surface.
Pointillism is a similar technique but uses dots to create an image or form, with colours blending optically from a distance.
To achieve these effects, gently tap the tip of the oil pastel on the paper, varying the pressure and size of the dots to create depth and dimension.
Sgraffito and scratching techniques
Sgraffito is a technique where you scratch away the top layer of oil pastel to reveal the colour beneath, creating lines and patterns.
Use a sharp tool like a palette knife, toothpick, or stylus to carefully scratch away the top layer of pastel.
This technique works best when you have applied multiple layers of contrasting colours.
Hatching and cross-hatching
Hatching involves creating parallel lines to build up areas of colour and shading.
Cross-hatching is a variation where lines are drawn in intersecting patterns, increasing the density of the lines for deeper shading.
These techniques can add texture and depth to your artwork and are especially effective for creating shadows and highlights.
Smeared and blended effects
Smearing is a technique that involves spreading the oil pastel directly on the surface using your fingers or a blending tool.
This method creates smooth transitions between colours and can be used to soften edges or blend large areas.
Try using a paper stump (tortillon) or silicone colour shaper for more precise blending and control.
Layering and glazing techniques
Layering involves applying multiple layers of oil pastel, either in the same or different colours, to create depth and richness in your artwork.
Glazing is a technique where a thin layer of a lighter or more transparent colour is applied over a darker base colour, creating a new hue or altering the tone of the base colour.
When using these techniques, start with lighter colours and gradually build up to darker shades, allowing each layer to partially show through for added complexity.
By experimenting with these basic techniques, you can develop a greater understanding of the diverse possibilities offered by oil pastels. As you grow more comfortable with the medium, continue exploring new methods and combining techniques to create unique and captivating artwork.
Exploring Advanced Oil Pastel Techniques

As you become more proficient with oil pastels, it's time to explore advanced techniques that can elevate your artwork and add depth, texture, and complexity. In this section, we will discuss some advanced oil pastel techniques that can help you push the boundaries of your creativity.
Impasto effects
Impasto is a technique where thick layers of oil pastel are applied to create a three-dimensional, textured surface.
Use a palette knife or a stiff brush to apply generous amounts of oil pastel, building up the layers to achieve the desired thickness.
Experiment with various tools and application methods to create unique textures and patterns on the surface.
Texturing techniques
Texturing involves creating tactile surfaces and patterns by manipulating the oil pastels or the surface itself.
Press objects like bubble wrap, fabric, or textured paper into the oil pastel to transfer their pattern onto your artwork.
Alternatively, use tools like combs, toothpicks, or forks to scrape and carve the surface, creating ridges and grooves in the pastel layers.
Scumbling and dry brushing
Scumbling is a technique where a thin layer of oil pastel is applied over a dry base layer, allowing the colours to mix visually without blending them completely.
Dry brushing involves using a stiff brush with minimal oil pastel to create a broken or scratchy effect on the surface.
Both techniques are effective for adding texture, depth, and visual interest to your artwork.
Creating gradients and smooth transitions
Gradients involve transitioning smoothly from one colour to another, often used to create realistic lighting and shading effects.
Apply the first colour and then gradually blend it into the second colour using your fingers, a blending tool, or a brush.
Practise this technique with various colour combinations and blending methods to achieve seamless, natural transitions.
Incorporating mixed media with oil pastels
Oil pastels can be combined with other art mediums to create unique and dynamic mixed-media pieces.
Experiment with incorporating materials like acrylic paint, watercolour, coloured pencils, or collage elements into your artwork.
Keep in mind that some mediums may not adhere well to the oily surface of oil pastels, so consider applying a fixative or using a barrier layer between the different materials.
By exploring these advanced techniques, you will continue to expand your artistic repertoire and discover new, exciting ways to express yourself using oil pastels. Remember that experimentation is key; don't be afraid to take risks and push your creative boundaries as you continue to grow and develop as an artist.
Step-by-Step Guide for Using Oil Pastels
Creating a captivating piece of art with oil pastels involves several steps, from initial planning to final touches. This section provides a step-by-step guide to help you create beautiful oil pastel artwork.
Step 1: Choosing a subject and sketching the composition
Select a subject for your artwork, such as a still life, landscape, or portrait.
Study the subject's shapes, colours, and textures to gain a better understanding of its features.
Lightly sketch the composition onto your chosen surface using a pencil, ensuring that the lines are faint enough to be covered by the oil pastels.
Step 2: Blocking in colours and establishing the base layer
Begin by applying the main colours to your artwork, focusing on large areas and general shapes rather than details.
Use the side of the oil pastel to cover larger areas quickly and efficiently.
This base layer sets the foundation for subsequent layers and helps establish the overall colour scheme and mood of the piece.
Step 3: Adding details and refining the artwork
Start adding details such as shadows, highlights, and textures to your composition.
Use the tip of the oil pastel for precise lines and intricate details.
Pay attention to the direction of your strokes, as this can affect the appearance of texture and depth in your artwork.
Step 4: Blending and layering for depth and dimension
Blend colours and edges using your fingers, a blending tool, or a brush to create smooth transitions and gradients.
Apply additional layers of oil pastel to build up colour intensity, depth, and complexity in your artwork.
Experiment with various techniques such as glazing, hatching, and scumbling to achieve different effects and textures.
Step 5: Final touches and finishing the artwork
Review your artwork and make any necessary adjustments to colour, contrast, or details.
Add any final touches, such as highlights or accents, to enhance the overall appearance of the piece.
Once satisfied with your work, apply a fixative spray to protect the surface from smudging and fading.
By following this step-by-step guide, you can create stunning oil pastel artwork that showcases your skills and artistic vision. Remember, practice is essential for improvement, so continue experimenting with various subjects, techniques, and styles to develop your unique voice as an oil pastel artist.
Tips and Tricks for Using Oil Pastels
To elevate your oil pastel artwork, it's essential to learn some tips and tricks that can enhance your skills and help you overcome challenges. In this section, we will discuss various techniques and solutions for working with oil pastels.
Understanding colour theory and colour mixing
Familiarise yourself with colour theory principles, such as the colour wheel, complementary colours, and colour harmony.
Experiment with mixing oil pastels directly on the surface or using a palette to create new shades and tones.
Use a limited colour palette to achieve colour harmony and avoid muddy, unintentional mixtures.
Creating texture and expressive effects
Vary the pressure and direction of your strokes to create different textures and effects.
Experiment with tools like palette knives, brushes, or found objects to add unique textures and patterns to your artwork.
Embrace the expressive nature of oil pastels and use bold, dynamic strokes to convey emotion and energy.
Blending techniques for smooth transitions
Practice blending colours using your fingers, blending tools, or brushes to achieve seamless gradients and transitions.
Experiment with various blending methods, such as dry blending, solvent blending, or wet blending with water or oil.
Layer colours gradually, starting with lighter shades and building up to darker ones for added depth and dimension.
Using fixatives and preserving oil pastel artwork
Apply a fixative spray to protect your finished artwork from smudging, fading, and dust.
Choose a fixative specifically designed for oil pastels or one labelled as "workable" to ensure compatibility.
Store your artwork in a dry, cool place, and consider framing it under glass to provide additional protection.
Troubleshooting common issues and mistakes to avoid
Avoid overworking or over-blending your colours, which can result in a muddy or dull appearance.
Use a clean blending tool or finger for each colour to prevent unintentional mixing.
If you encounter a problem area, consider using the sgraffito technique to remove the top layer of oil pastel and reveal the underlying colour.
Inspiration and Ideas for Oil Pastel Art
To keep your creativity flowing, explore various subjects and styles in your oil pastel artwork. This section provides some inspiration and ideas to fuel your artistic journey.
Oil pastel landscape tutorial
Study landscape compositions, focusing on elements such as perspective, depth, and atmosphere.
Experiment with techniques like hatching, stippling, and scumbling to create realistic textures and effects in your landscape art.
Still life studies with oil pastels
Arrange a still life composition with objects that have interesting shapes, colours, and textures.
Practise rendering the forms, shadows, and highlights using various oil pastel techniques.
Portraits and figures in oil pastels
Study human anatomy, facial features, and expressions to improve your portraiture skills.
Use oil pastels to create expressive, bold portraits, focusing on capturing the subject's likeness and emotion.
Abstract and expressive oil pastel art
Embrace the freedom of abstraction by experimenting with colour, form, and texture without the constraints of realism.
Use oil pastels to create dynamic, energetic compositions that convey emotion and movement.
By exploring these tips, tricks, and ideas, you will continue to grow as an oil pastel artist and discover new ways to express yourself through this versatile and vibrant medium. Remember, practise and experimentation are key to developing your unique artistic voice and style.
In this guide, we explored the world of oil pastels, covering essential tools and materials, basic and advanced techniques, step-by-step instructions for creating artwork, and various tips and tricks to enhance your skills. From understanding colour theory and blending methods to experimenting with texture and mixed media, we delved into numerous aspects of oil pastel artistry.
As you continue your artistic journey with oil pastels, remember that exploration and experimentation are crucial to developing your unique style and voice. Embrace the versatility and vibrancy of this medium, and don't be afraid to take risks and push your creative boundaries. With practice, patience, and a spirit of curiosity, you will unlock the full potential of oil pastels and create captivating, expressive artwork that showcases your talent and passion.
Additional readings
Oil Painting Techniques: Mastering Oil Painting Guide


