In this article, we'll dive into the world of varnish and how it can work wonders for protecting your oil paintings and keeping their colours vibrant. We'll also share some tips for choosing the perfect varnish and teach you how to apply it like a pro to keep your masterpieces looking fresh and fabulous!
Using varnish over finished artwork offers several benefits:
Protection: Varnish forms a protective layer over the surface of the artwork, shielding it from dust, dirt, moisture, and UV rays. This helps to preserve the colours and integrity of the artwork over time, reducing the risk of damage and fading.
Enhanced Appearance: Varnish can enhance the visual characteristics of the artwork by deepening colours, increasing contrast, and adding a uniform sheen. It can also improve the overall appearance by evening out any inconsistencies in the surface texture.
Durability: Varnish provides a durable finish that helps to prevent scratches, scuffs, and other physical damage to the artwork. This is particularly important for pieces that may be handled frequently or displayed in high-traffic areas.
Ease of Cleaning: The smooth, sealed surface created by varnish makes it easier to clean and maintain the artwork. Dust and dirt can be gently wiped away without damaging the underlying paint or substrate.
Professional Finish: Applying varnish to your artwork gives it a professional-looking finish that can increase its perceived value and appeal to collectors, galleries, and buyers.
Overall, using varnish is a simple and effective way to protect and enhance your finished artwork, ensuring that it remains vibrant and beautiful for years to come.
Choosing the Right Varnish
Each type of varnish offers unique characteristics and benefits, so it's essential to consider factors such as the type of paint used, desired finish, application method, and long-term preservation needs when selecting the appropriate varnish for your painted artwork. Testing the varnish on a small area before application to the entire artwork can help ensure compatibility and desired results.
Here's a summary of the different types of commonly used varnishes, their features, benefits and suitability for different mediums:
Traditional Varnishes (Oil Paintings):
- Examples: Dammar, mastic.
- Made from natural resins.
- Offer a high-gloss finish.
- Can yellow over time.
- Provides excellent protection and enhancement for oil paintings.
Modern Synthetic Varnishes (Oil Paintings):
- Examples: Polyurethane, acrylic.
- Made from synthetic polymers.
- Available in gloss, satin, and matte finishes.
- More durable and resistant to yellowing than traditional varnishes.
- Provides protection and enhancement for oil paintings.
Spray Varnishes (Oil or Acrylic Paintings):
- Available in oil-based or acrylic formulations.
- Convenient aerosol application.
- Offer various sheens and finishes.
- Suitable for both oil and acrylic paintings.
- Provide protection and enhancement with even coverage.
Acrylic Polymer Varnishes (Acrylic Paintings):
- Specifically formulated for use with acrylic paints.
- Made from acrylic polymer emulsions.
- Available in gloss, satin, and matte finishes.
- Offer excellent clarity, UV protection, and flexibility.
- Ideal for preserving and enhancing acrylic paintings.
Water-Based Varnishes (Acrylic Paintings):
- Formulated with acrylic resins.
- Non-toxic and low-odour.
- Easy cleanup with water.
- Available in gloss, satin, and matte finishes.
- Suitable for artists concerned about using solvents.
Removable Varnishes:
- Examples: Retouch varnish, dammar varnish dissolved in solvents.
- Can be easily removed with solvents.
- Useful for cleaning and restoration purposes.
- Available for both oil and acrylic paintings.
How to Varnish Your Artwork
Varnishing your artwork is a straightforward process, but it requires care and attention to ensure a smooth and even finish. Here's a general guide on how to varnish your artwork:
Step One: Prepare Your Workspace
- Choose a well-ventilated area with good lighting to work in.
- Lay down a protective covering on your work surface to catch any drips or spills.
- Make sure your artwork is clean and free from dust or debris.
Step Two: Select Your Varnish
- Choose a varnish appropriate for your type of artwork (oil or acrylic) and desired finish (gloss, satin, matte).
- Shake or stir the varnish thoroughly before use to ensure it's well mixed.
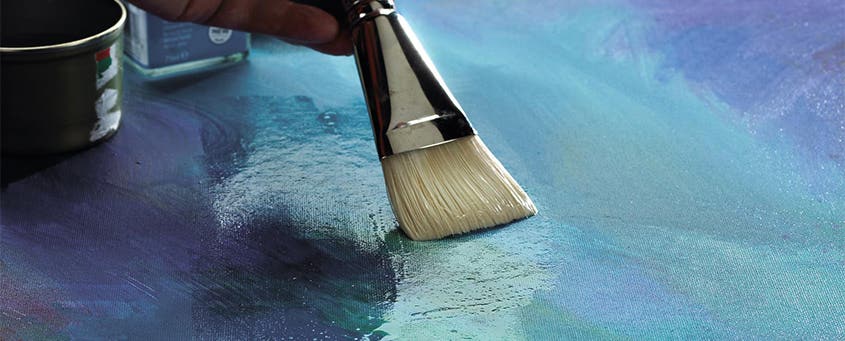
Step Three: Apply the Varnish
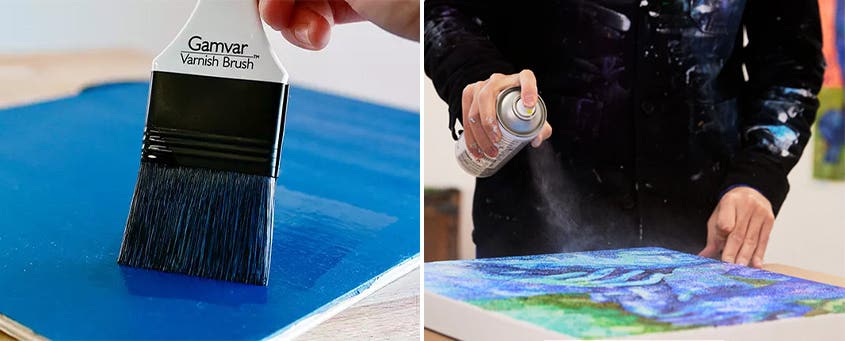
- If using a brush-on varnish, pour a small amount into a clean container.
- Dip a clean, soft brush into the varnish, ensuring the bristles are evenly coated but not overloaded.
- Begin applying the varnish to your artwork in smooth, even strokes, working from one edge to the other.
- Avoid overworking the varnish, as this can cause streaks or bubbles.
- If using a spray varnish, hold the can approximately 12-18 inches away from the artwork and apply in a steady, sweeping motion, overlapping each pass slightly for even coverage.
Step Four: Allow to Dry
- Follow the manufacturer's instructions for drying times, as these can vary depending on the type of varnish used.
- Make sure the artwork is positioned horizontally or vertically to prevent drips or pooling of varnish.
- Inspect and Reapply (if Necessary):
- Once the first coat of varnish has dried completely, inspect the artwork for any areas that may need additional coverage.
- If necessary, apply a second coat of varnish using the same technique as before.
Step Six: Final Drying and Curing
- Allow the varnish to dry completely according to the manufacturer's instructions.
- Some varnishes may require additional curing time to fully harden and develop their protective properties.
Step Seven: Clean Up
- Clean your brushes or any other tools used for varnishing with the appropriate solvent (water for water-based varnishes, mineral spirits for oil-based varnishes).
- Dispose of any used materials properly, following local regulations.
By following these steps, you can effectively varnish your artwork to provide protection and enhance its appearance for years to come.
Our Top Tips for the Perfect Finish
Practice on Test Pieces: Before varnishing your main artwork, practice on small test pieces or scrap canvases to get a feel for the process and the varnish you're using.
Choose the Right Varnish: Select a varnish that's suitable for your type of artwork (oil or acrylic) and consider factors such as gloss level and compatibility with your painting medium.
Ensure Cleanliness: Make sure your workspace, brushes, and artwork are clean and free from dust, dirt, or debris before varnishing to prevent imperfections in the finish.
Apply Thin Coats: It's better to apply multiple thin coats of varnish rather than one thick coat. Thin coats dry more evenly and reduce the risk of streaks, bubbles, or pooling.
Use Quality Brushes: Invest in good-quality brushes specifically designed for varnishing to achieve smooth, even application. Avoid using brushes that shed bristles or leave streaks.
Work Methodically: Start varnishing from one edge of the artwork and work methodically across the surface, overlapping each stroke slightly to ensure even coverage. Take your time and avoid rushing the process.
Watch for Bubbles: Keep an eye out for air bubbles that may form in the varnish as you apply it. If you notice any bubbles, gently brush over them to release trapped air and smooth out the surface.
Consider Ventilation: If using solvent-based varnishes or spray varnishes, ensure you're working in a well-ventilated area to avoid inhaling fumes. Consider using a respirator mask if necessary.
Allow Proper Drying Time: Follow the manufacturer's instructions for drying times and avoid touching or moving the artwork until the varnish has fully dried and cured to prevent smudges or fingerprints.
Be Patient and Take Breaks: Varnishing can be a time-consuming process, so be patient and take breaks as needed to maintain focus and avoid fatigue. Rushing the process can lead to mistakes.
By following these tips and practising varnishing techniques, you can achieve professional-looking results and effectively protect and enhance your artwork.
If you need further guidance or you want to check out our range of mediums and varnishes, come and see our friendly staff in store. Many of our staff are artists themselves and they are always happy to share their expert knowledge.
-
 Winsor & Newton Artists' Oil VarnishesFrom $33.50
 -
 Derivan Polymer VarnishesFrom $41.50
 -
 Liquitex High Gloss VarnishesFrom $41.95
 -
 Gamblin Gamvar Satin VarnishesFrom $26.50 $33.25


