Level: Easy
Duration: 30 mins
We’re a huge fan of beautiful and unique wrapping paper! However, these can be costly and with Christmas just around the corner, the cost could pile up with all the gifts you’ll need to wrap. Here’s a quick DIY Christmas wrapping paper project that is easy and fun to create. Even the kids can join in and create their own!
What you will need
- Kraft Paper
- Chalk Markers & paint markers (any colour)
- Adhesives, Tape
- String, ribbon, jute twine, baker’s twine, cotton twine
How to do it
- Gather all your supplies
This includes kraft paper, twine, paint markers, tape, ribbons, or anything that you feel like could personalize your wrapping paper. The possibilities are endless, and you can create your wrapping paper as unique and creatively as you like. Don’t forget your gifts! We will use them as a guide later. - Time to measure & cut
Measure out the kraft paper needed for each present. This way, you can make different designs for each present without wasting the kraft paper. Cut the paper accordingly depending on your measurements. It doesn’t have to be perfect! Just make sure that you have enough to use when wrapping the gift.
- Let’s Decorate
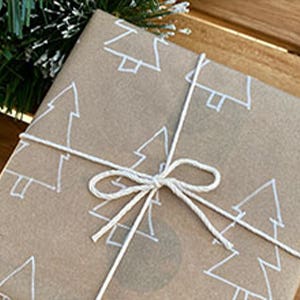
Once you have the kraft paper cut to size, it’s time to bring out your markers and start drawing and decorating. Our favourite is this simple drawing of a Christmas tree. Again, it does not need to be perfect, it also gives it that rustic look we are going for. - Wrap it up
Take your beautifully decorated wrapping paper and wrap up your gift. Finish it off by wrapping the gift with twine and adding a small bow. This is optional but it adds a quaint charm to the wrapped gift. And there you have your DIY Christmas wrapping paper.
Shop more Craft and Design products with us!
Related Articles:
Christmas Stocking Papercraft Project


